Table of Contents
- Understanding How Coffee Percolators Work: An Outline
- Understanding How Coffee Percolators Work: The Basics
- Detailed Guide: How Coffee Percolators Work
- Preparation: Materials for Coffee Percolator Operation
- Initial Setup: Preparing a Coffee Percolator
- Water-to-Coffee Ratio and Grind Size Considerations
- Step-by-Step: Percolating Coffee Brewing Instructions
- Best Practices: Enhancing Coffee Percolator Flavor
- Common Mistakes: Avoiding Pitfalls in Coffee Percolators
- Advanced Techniques: Optimizing Coffee Percolator Performance
- Optimization: Methods for Better Coffee Percolator Results
- Troubleshooting: Fixing Common Coffee Percolator Issues
Understanding How Coffee Percolators Work: An Outline
The Essence of Percolators: Brewing and Aroma
Coffee percolators brew coffee using a continuous cycle of boiling and gravity. This method extracts flavor and aroma from coffee grounds, creating a robust and distinctive taste.
Percolators are valued for their ability to produce strong coffee with a unique aroma that many coffee enthusiasts find appealing. Despite the rise of modern coffee-making technologies, percolators maintain a dedicated following.
While their popularity has waned compared to drip coffee makers and espresso machines, percolators still hold a niche market share. Statistics show that they account for approximately 5% of coffee brewing methods used today. This enduring presence highlights the unique flavor profile and brewing experience they offer.
A Brief History: The Origin of Coffee Percolators
The concept of percolating coffee has historical roots dating back to Count Rumford, who initially explored the idea as an alternative to tea and alcoholic beverages. This early concept laid the groundwork for future coffee brewing innovations.
The modern stove-top percolator, as we recognize it today, was patented by Hanson Goodrich on August 16, 1889. This patent marked a significant milestone in the development and commercialization of percolators.
Recently, there has been a resurgence in the popularity of percolators, driven by a growing interest in vintage brewing methods and a desire for a more hands-on coffee-making experience. This revival reflects a broader appreciation for the tradition and unique qualities of percolated coffee.
Outline: Mastering the Art of Percolator Coffee
This guide will help you understand the core concepts behind how a coffee percolator works, focusing on the boiling cycle and how it affects the final flavor of your brew. Grasping these concepts will help you brew the perfect cup.
You’ll learn practical applications, including how to properly use a percolator, select the right coffee grounds, and control the brewing process to achieve your desired taste. By the end of this guide, you’ll be equipped to brew delicious coffee using a percolator.
Understanding How Coffee Percolators Work: The Basics
Defining a Percolator in How Coffee Percolators Work
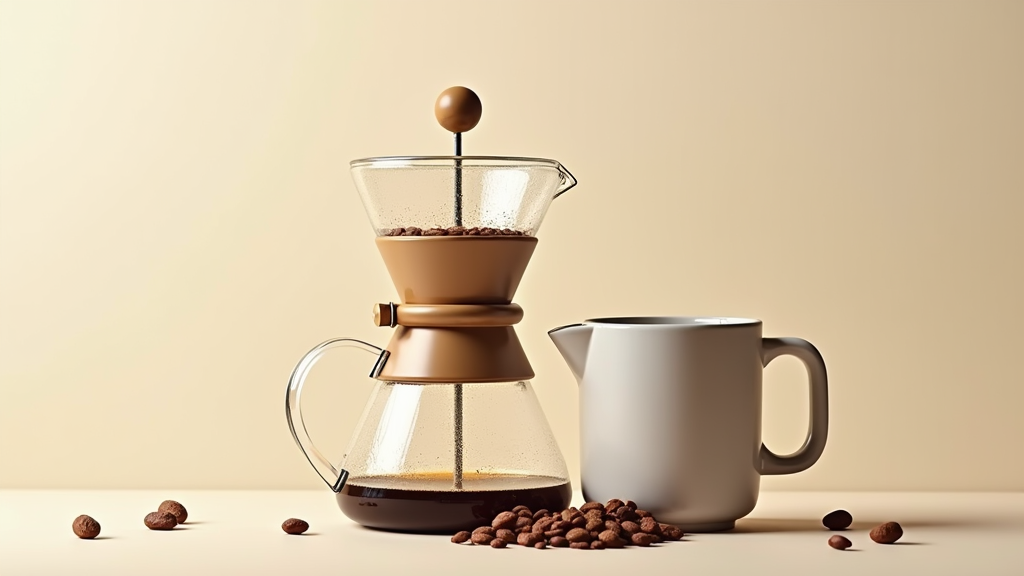
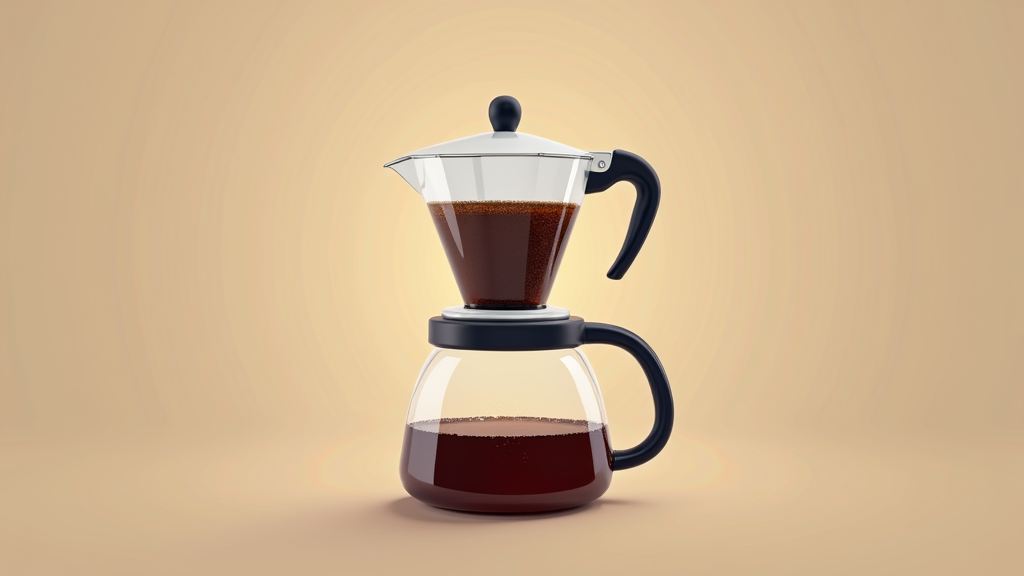
**Expert Insight:** Understanding the core components of a coffee percolator, like the pot, vertical tube, and coffee chamber, is crucial for optimal brewing. Choosing between stovetop and electric models depends on your preference for heat control and convenience, with electric percolators offering automatic shut-off for enhanced safety.
A percolator is a specific type of coffee brewing device that works by continuously cycling boiling water or near-boiling water through coffee grounds. This process extracts the coffee flavor, creating a brewed beverage.
Core Principles of How Coffee Percolators Work
The core principle behind how coffee percolators work is the continuous cycling of heated water. This cycle repeatedly passes through the coffee grounds, extracting flavor and increasing the strength of the coffee with each pass.
Essential Components for How Coffee Percolators Work
To understand how coffee percolators work, it’s crucial to know the essential components that make up the device. These components work together to create the brewing cycle.
- Pot: The main body of the percolator, featuring a bottom chamber that holds water (typically enough for 4-12 cups).
- Vertical Tube: A hollow tube, generally 6-10 inches tall depending on the percolator’s size, that allows heated water to flow upward.
- Coffee Chamber: A perforated basket, usually 2-3 inches in diameter, that holds the coffee grounds.
- Lid: Typically made of glass or stainless steel, with a knob that allows users to view the brewing process.
Key Features in How Coffee Percolators Work
Several key features differentiate percolators and affect how coffee percolators work. These features can significantly impact the brewing experience and coffee quality.
- Material: Percolators are commonly made from stainless steel, aluminum, or enamel. Each material offers different heat retention and durability characteristics.
- Size: The cup capacity of a percolator varies, affecting how much coffee can be brewed at one time.
- Heat Source: Percolators are designed for either stovetop or electric heat sources, each offering unique convenience and control.
Electric vs. Stovetop Models in How Coffee Percolators Work
A significant variation in how coffee percolators work lies in the heat source. Stovetop models require an external heat source, while electric models have a built-in heating element. Electric models often include automatic shut-off features for safety and convenience.
Detailed Guide: How Coffee Percolators Work
**Key Takeaway:** Achieving the perfect percolated coffee hinges on using a coarse grind and carefully monitoring the brewing time. A coarse grind prevents grounds from seeping into your brew, while controlling the percolation rate and time prevents both weak and bitter results, ensuring a balanced and flavorful cup.
Preparation: Materials for Coffee Percolator Operation
To begin brewing coffee with a percolator, gather the necessary materials. You’ll need a coffee percolator, coarsely ground coffee, and filtered water. A stovetop or electrical outlet will serve as your heat source.
- Coffee percolator.
- Coffee grounds (coarse grind recommended).
- Water (filtered water recommended).
- Heat source (stovetop or electrical outlet).
Initial Setup: Preparing a Coffee Percolator
Before brewing, thoroughly clean the percolator. Fill the bottom chamber with the correct amount of water, usually indicated by cup markings (e.g., fill to the 6-cup line for a 6-cup percolator). Place the vertical tube into the pot and add coarse coffee grounds to the perforated chamber, typically one tablespoon per cup. Secure the lid tightly.
Water-to-Coffee Ratio and Grind Size Considerations
The water-to-coffee ratio is crucial for achieving the desired strength; adjust it to your taste preferences. Using a coarse grind is essential to prevent coffee grounds from passing through the perforations and ending up in your final brew.
Step-by-Step: Percolating Coffee Brewing Instructions
Place the prepared percolator on your heat source. Heat until the water boils and the percolation cycle initiates, which usually takes about 5-10 minutes. Once percolation begins, reduce the heat to maintain a gentle, steady cycle.
Best Practices: Enhancing Coffee Percolator Flavor
For optimal flavor, always use filtered water. Monitor the percolation rate; a rate that’s too fast may result in weak coffee, while a rate that’s too slow can over-extract and lead to bitterness.
Common Mistakes: Avoiding Pitfalls in Coffee Percolators
Avoid overfilling the coffee chamber, as this can cause grounds to overflow. Using too fine a grind will also result in grounds in your coffee. Over-brewing can make the coffee bitter, so keep a close eye on the brewing time.
Advanced Techniques: Optimizing Coffee Percolator Performance
Use a timer for precise control over the brewing time. Experiment with different coffee-to-water ratios to discover your ideal brew strength. Pre-heating the water before adding it to the percolator can reduce the overall brewing time.
Optimization: Methods for Better Coffee Percolator Results
On gas stovetops, using a heat diffuser can prevent scorching and ensure even heating. This helps maintain a consistent percolation cycle and prevents localized overheating.
Troubleshooting: Fixing Common Coffee Percolator Issues
If your coffee is too weak, increase the brewing time or the coffee-to-water ratio. If it’s too bitter, reduce the brewing time or use a coarser grind. If you find grounds in your coffee, ensure the perforated chamber is properly seated and that you are using a coarse grind.